JWT Authentication in Node.js Explained Simply
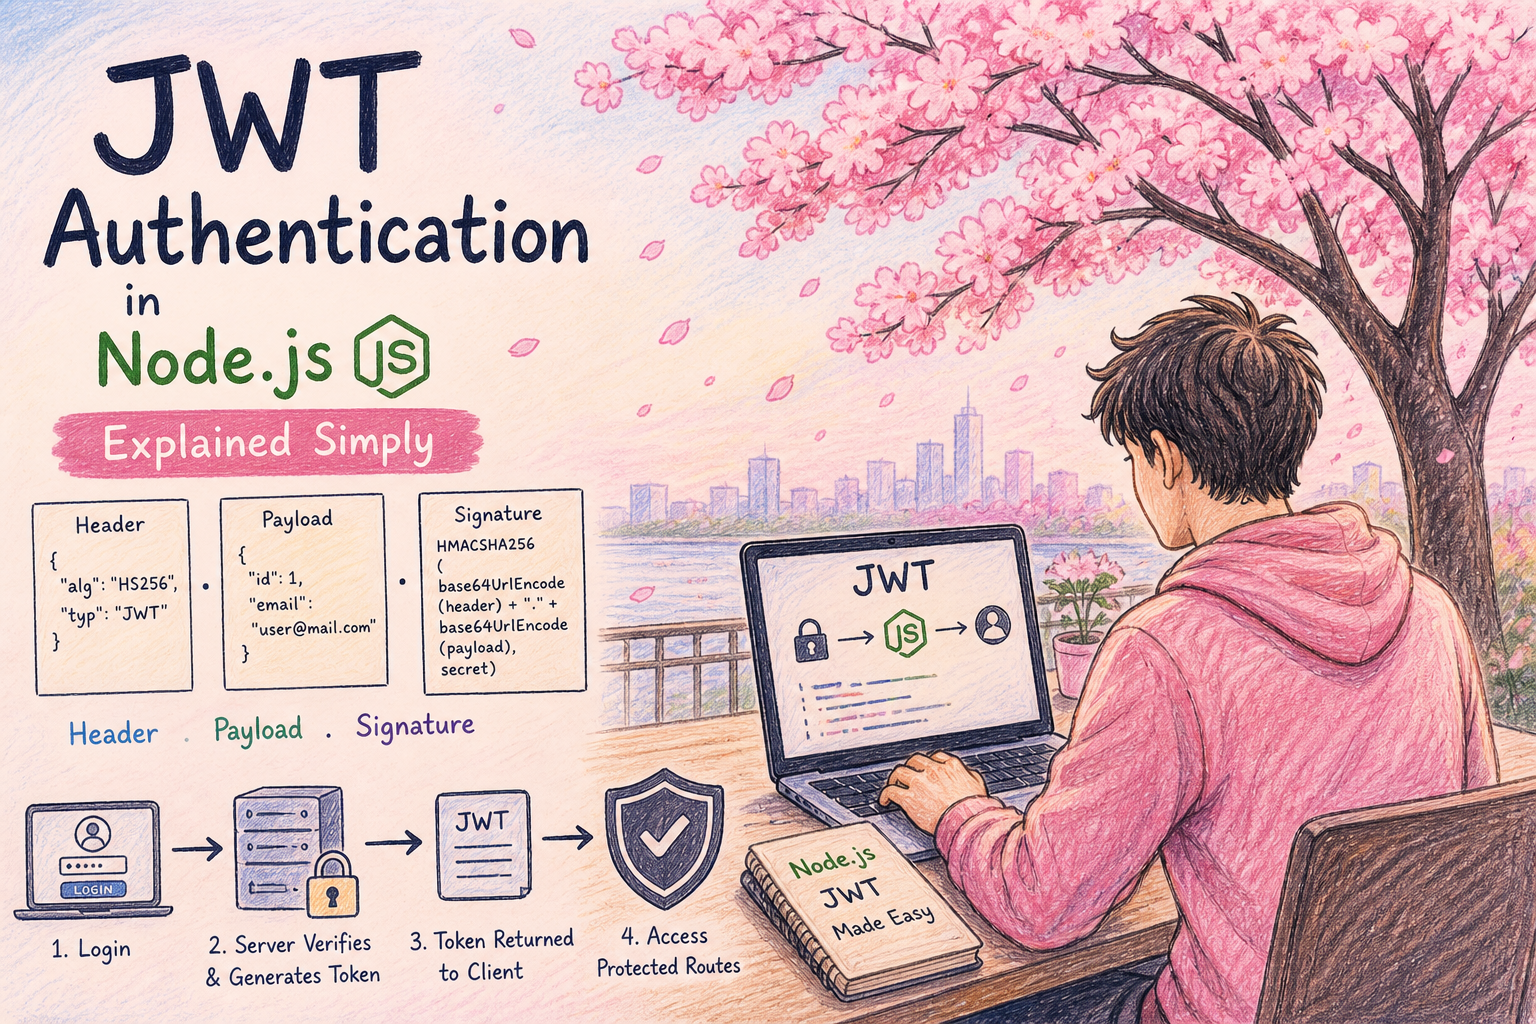
A Complete Beginner → Advanced → Production Guide
Why Authentication is Required (Start Here)
Imagine you’re building a real-world application:
A job portal
A banking system
Or even your portfolio dashboard
Now ask yourself:
How does your system know who is making a request?
Without authentication:
Anyone can access private data
Users can impersonate others
Sensitive operations become unsafe
Authentication is simply:
The process of verifying “Who are you?”
The Problem with Traditional Authentication
Before JWT, most apps used:
Sessions
Stored on the server
Problems:
Server memory usage increases
Hard to scale (multiple servers)
Requires session storage (Redis, DB, etc.)
Enter JWT (JSON Web Token)
JWT solves these problems using a stateless approach.
Stateless = Server does NOT store user session
Instead:
Server gives a token
Client stores it
Client sends it on every request
What is JWT?
JWT is a secure string token that contains user data.
Example:
eyJhbGciOiJIUzI1NiIsInR5cCI6IkpXVCJ9
.
eyJpZCI6MSwiZW1haWwiOiJjaGl0dGFyYW5qYW5AZ21haWwuY29tIn0
.
SflKxwRJSMeKKF2QT4fwpMeJf36POk6yJV_adQssw5c
Looks scary, but it’s just three parts combined.
Structure of JWT (Core Concept)


JWT = HEADER . PAYLOAD . SIGNATURE
1. Header
Contains:
Algorithm used
Token type
Example:
{
  "alg": "HS256",
  "typ": "JWT"
}
2. Payload
Contains user data (claims):
{
  "id": 1,
  "email": "user@example.com"
}
Important:
Do NOT store passwords
Payload is visible (Base64 encoded, not encrypted)
3. Signature
This is what makes JWT secure.
Created using:
Header + Payload + Secret Key
If anything changes → signature breaks → token invalid
Stateless Authentication (Key Insight)
Traditional:
Client → Server → Session stored
JWT:
Client → Server → Token returned → Client stores → Sends every time
JWT Authentication Flow (Login to Access)


Step-by-step flow:
User logs in
Server verifies credentials
Server generates JWT
Client stores token
Client sends token in requests
Server verifies token
Access granted or denied
Project Setup (Node.js + Express)
Let’s build everything from scratch.
Install dependencies
npm init -y
npm install express jsonwebtoken bcryptjs
Step 1: Basic Server
const express = require("express");
const app = express();

app.use(express.json());

app.listen(3000, () => {
  console.log("Server running on port 3000");
});
Step 2: Fake Database (Custom Example)
const users = [
  {
    id: 1,
    email: "test@gmail.com",
    password: "\(2a\)10$exampleHashedPassword"
  }
];
Step 3: Login Route (Generate JWT)
const jwt = require("jsonwebtoken");
const bcrypt = require("bcryptjs");

app.post("/login", async (req, res) => {
  const { email, password } = req.body;

  const user = users.find(u => u.email === email);
  if (!user) return res.status(400).json({ msg: "User not found" });

  const isMatch = await bcrypt.compare(password, user.password);
  if (!isMatch) return res.status(400).json({ msg: "Invalid password" });

  const token = jwt.sign(
    { id: user.id, email: user.email },
    "secretKey123",
    { expiresIn: "1h" }
  );

  res.json({ token });
});
Step 4: Sending Token with Requests
Client sends token like:
Authorization: Bearer <token>
Example:
fetch("/profile", {
  headers: {
    Authorization: "Bearer your_token_here"
  }
});
Step 5: Middleware to Protect Routes
const authMiddleware = (req, res, next) => {
  const authHeader = req.headers.authorization;

  if (!authHeader) {
    return res.status(401).json({ msg: "No token provided" });
  }

  const token = authHeader.split(" ")[1];

  try {
    const decoded = jwt.verify(token, "secretKey123");
    req.user = decoded;
    next();
  } catch (err) {
    res.status(403).json({ msg: "Invalid token" });
  }
};
Step 6: Protected Route
app.get("/profile", authMiddleware, (req, res) => {
  res.json({
    message: "Protected data",
    user: req.user
  });
});
Real Business Insight (Important)
JWT is used in:
E-commerce dashboards
Banking APIs
SaaS products
Mobile apps
Why?
Because:
No server session storage
Easy scaling
Works well with microservices
Advanced Concepts (Level Up)
1. Access Token vs Refresh Token
Access Token
- Short-lived (15 min – 1 hour)
Refresh Token
Long-lived
Used to generate new access tokens
2. Token Expiry Handling
jwt.sign(payload, secret, { expiresIn: "15m" });
If expired:
- Client must re-login OR use refresh token
3. Secure Storage (Critical)
Never store JWT in:
- LocalStorage (XSS risk)
Better options:
- HTTP-only cookies
4. Role-Based Authorization
if (req.user.role !== "admin") {
  return res.status(403).json({ msg: "Access denied" });
}
Common Mistakes (Avoid These)
Storing sensitive data in payload
Using weak secret keys
Not setting expiration
Not validating token properly
Sending token without "Bearer"
Performance Insight
JWT is fast because:
No DB lookup for sessions
Everything is inside token
But:
- Large payload = slower requests
When NOT to Use JWT
Avoid JWT if:
You need to revoke sessions instantly
You want full control over sessions
In such cases:
- Use server-side sessions
Production-Level Architecture
Frontend (React / Mobile)
        ↓
API Gateway
        ↓
Auth Service (JWT)
        ↓
Microservices
JWT acts as:
A universal identity key across services
Token Validation Lifecycle


Final Mental Model (Remember This)
JWT = Identity + Trust + Stateless Communication
Summary
Authentication verifies user identity
JWT replaces session-based auth
Token contains user data + signature
Client stores token and sends with requests
Middleware protects routes
Used in scalable real-world systems
What You Should Do Next
Implement refresh tokens
Add logout mechanism
Integrate with frontend (React)
Secure using HTTP-only cookies
Deploy using Docker + Nginx
Closing Thought
JWT is not just a concept — it’s a foundation of modern backend systems.
Mastering it properly means:
You can build secure APIs
You can scale systems
You think like a backend engineer


